Quick and Simple: How to Create and Upload a Unity Project to Qoom

Ever wished you could make your own games? Or wished you could play your favorite games from the convenience of an Internet browser?
I sure have! If only there was a really easy way of creating games and then uploading them to the internet for everyone to play….
Good news-- there’s actually a really easy way to do just that!
The secret recipe?
Qoom + Unity + WebGL!!
Step 1: Download Unity
First things first, we’re going to need to download Unity Hub. If you’re unfamiliar with Unity, it’s a really cool game development platform that allows for people to create awesome 2D or 3D games with the C# programming language.
Step 2: Create your project
After downloading Unity Hub, open it up and create a new project by clicking on the blue “NEW” button.
There are plenty of awesome tutorials the Unity team has created, and a bunch of YouTube videos that can help you quickly understand the basics.
Important Tip: MAKE SURE TO SAVE YOUR PROJECT FREQUENTLY!! You wouldn’t want to lose all the progress you made if an accident happens!
Step 3: WebGL Build
After creating your game and finishing it up, you can easily export it to a variety of platforms by clicking on the “File” button at the top of the editor and then “Build Settings” from the drop down.
To make our project work with Qoom, we want to select WebGL for our platform.
Make sure to select all the scenes you want to include in the build! For simple games like mine, I just had one scene so it was super easy!
At the bottom left corner, you’ll see a Player Settings button. If you ever encounter problems with your build, most of the time you’ll just need to tweak some of the settings in there. Every computer is different, so Google will be your best friend during this process!!
At the bottom right corner, you’ll have two options.
Build - You’ll be prompted to select a folder where the files Unity generates will be saved. After the build completes, nothing will happen.
Build and Run - The same as above happens, but once the build completes, a web browser will open up with the game running on a local HTTP server Unity created for you to try out your game.
What if Unity’s not open/I only selected the Build option?
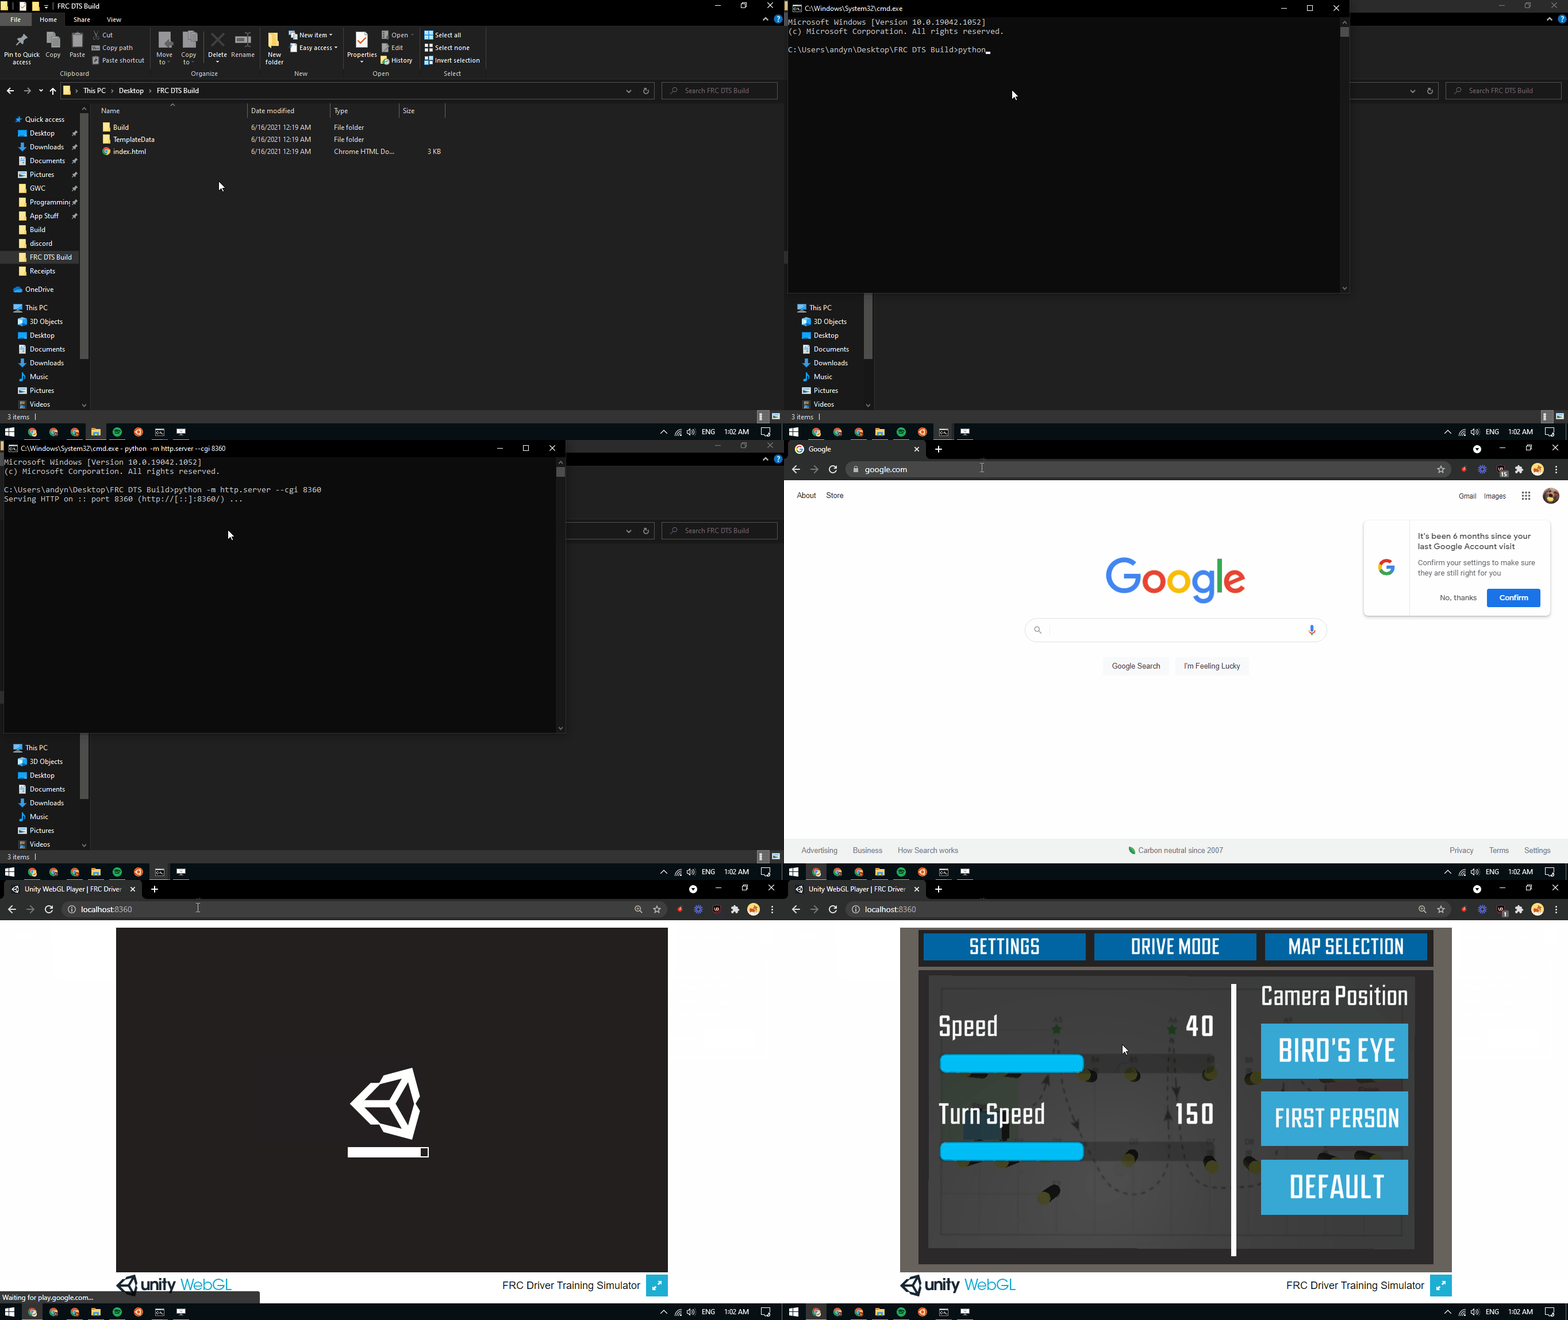
If you have Python installed, you can easily create your own local web server to test out your game!!
- Navigate to the folder where you built your project
- Click on the bar with your folder path and type “cmd” to open up a command prompt in your folder (refer to the GIF below).
- Next, type this command to start your web server.
- python -m http.server --cgi 8360
- This starts a web server on port 8360 that can work with your project.
- Then, go to your browser and go to localhost:8360 to see your project!

Step 4: Upload all the files to Qoom!!
Once you’ve tested out your game to your heart’s content, the last step is to just hop onto Qoom and add your files to a new project!!
First, click on the blue “NEW” button in your coding workspace, and on “File Upload”. Then navigate to your build folder and add your index.html file.
Next, go back to Qoom and repeat the process as above, this time clicking on “Folder Upload”. Then add your “Build” and “TemplateData” folders by repeating the above step twice.
Ta-da~~! Just like that, you’ve successfully uploaded your Unity project to Qoom!!
Check it out here: https://andyngo.qoom.space/~/CreatorGroupSpring2021 !